A fast-paced, realistic simulation of WWII aerial combat.
____________________________________________________
The basic game will be shipped in the Wave 1. All other items (expansions, add-ons, etc.) will be shipped later – in the Wave 2.
A separate shipping fee will be charged for each shipping wave, calculated by the package weight (using customary units - oz):
<17oz (~0,5kg) = $18 <35oz (~1,0kg) = $20
<52oz (~1,5kg) = $22 <70oz (~2,0kg) = $24
<88oz (~2,5kg) = $26 <105oz (~3,0kg) = $28
<123oz (~3,5kg) = $31 <141oz (~4,0kg) = $33
<158oz (~4,5kg) = $35 <176oz (~5,0kg) = $37
>176oz (>5kg) = $41
Latest Updates from Our Project:
Final testing
over 2 years ago
– Sat, Nov 04, 2023 at 01:02:43 PM
We can finally announce that we have reached the stage where we are doing the final testing of Age of Dogfights: WWII. The way we write the rules and check if everything works as we wanted will be covered in a separate update, but only when the shipping starts, so that the writing would not take up our precious time. Now, it is imperative that we check that the rules work well in different game variants (with and without optional rules). The second task is to see if we have foreseen a sufficient number of components (altitude stands, speed indicators, chits, etc.) for the games with a larger number of aircraft, and make sure that the standard 3 bi-fold board segments offer enough maneuvering space for fast fighters. Before presenting the analysis and conclusions after the games played, I would like to highlight a few remarks:
Spacers
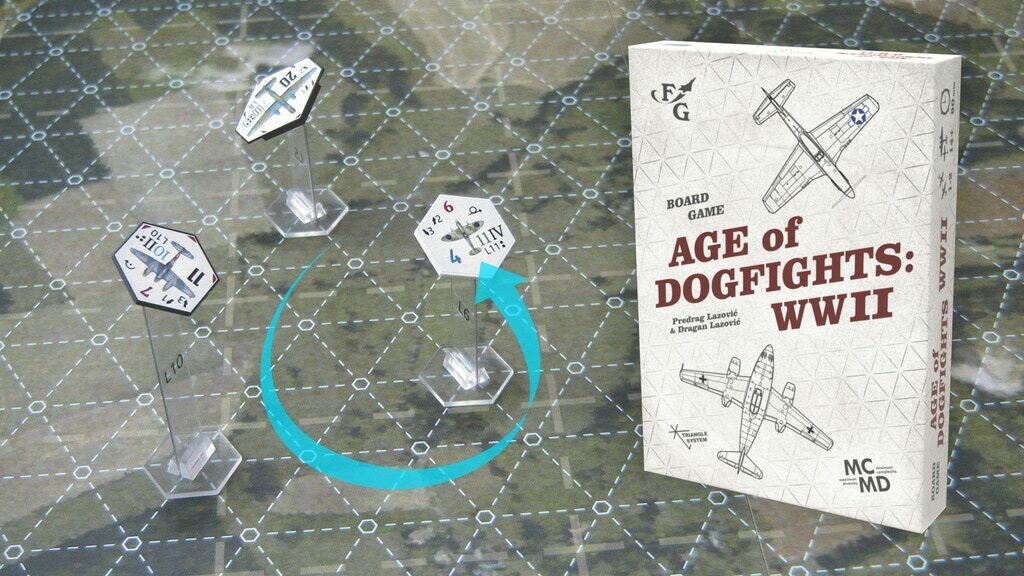
We assumed that the number of altitude stands could be insufficient (14 levels, 8 pieces each = 112 in total) for games with many aircraft. There are never 112 planes in one single game, but the problem is that even with 20 - 30 planes, a dozen stands of the same height may be needed. That's why we recently made punching tools for the production of spacers, transparent plastic elements that are placed under the altitude stands, raising them by one or two levels. A game set will contain 10 spacers (6 that raise by one level and 4 that raise the stand by two levels). That way, the potential problem of the lack of altitude stands is solved.
on the photo on the right, all altitude stands represent height L6
Speed Indicators, Speed Calculators and Purple die
One of the main improvements in AoD2 gameplay compared to the previous game is the introduction of the principles of inertia and energy. Reminder: in AoD1, players have only one blue die at their disposal, which modifies the number of steps each aircraft can take in one turn. The number obtained on that die is added to the basic speed value that is written on the control panel and on each token. In addition to that blue die, there is also a green one that can only be used by some aircraft types (single-seat, single-engine fighters) and for only a limited number of times during the game; it represents "full throttle", and therefore has higher numbers than the blue die.
In AoD2, at first we predicted 6 dice (5 different blue shades and 1 green) with different numbers. This gives players possibility to drastically influence the aircraft speed, but slow-flying aircraft can easily attack fast targets, which is not realistic. This is solved by using optional rule "Speed Difference When Firing", which requires tracking each aircraft speed in each turn. This is done by Speed Indicators, and we planned to include 23 of them in each set.
However, only when using optional rule "Inertia", the full effect of the concept of energy is achieved. In this case, instead of using different dice for movement speed, player can freely increase or decrease the aircraft speed, up to +2 or -3. We decided to introduce a new movement die, purple, with numbers -1, 0, 0, 0, 0, 1.
Although not necessary, as all calculations are the simplest math (adding or subtracting 1 to 4), we decided to make an auxiliary tool called Speed Calculator. It can be used when playing without optional rules, but it is most useful when playing with Inertia. In our testing, we used improvised piece of paper with drawn positions for the slider, and when printed, they will look like this:
----
All texts for updates we publish on our Kickstarter projects are written together by our whole team, but the further text in this update is written by me, Predrag (senior author). As already mentioned above, we will write about our way of working when creating AoD game series in one of the following updates. For now, I'll just say that for this game, Dragan, the junior author, was in charge of writing the optional rules "Speed Difference When Firing" and "Inertia". His task was also to find a convenient way to represent all the different firing positions, which was a tricky task, considering that this game, unlike AoD1, also has the roll tilt. During the work on it, Dragan consulted me all the time, but, I have to admit, I was skeptical of how everything would fit together in the end. I didn't doubt that the rules would realistically depict the situations in the air, but I was afraid that all of this would take the game away from our MCMD principle that we are proud of and that has been successfully proven in our previous games. That's why I am writing this entire text personally, from my point of view, with honest impressions I got while playing.
The first game, scenario: Warming Up for the Final Fight
We chose this scenario for our first game because it is a pure dogfight, without any air-to-surface and surface-to-air effects. The main feature of this scenario is that it has three episodes, and players determine the types and the number of planes that will participate in each episode. The choice of aircraft types can create advantage in certain episodes, but the total number of aircraft on each side is equal (17 each). I had German planes, and Dragan had British ones.
First episode
We played the episode according to the basic rules, without the optional ones. I decided to use 6 planes, 4 Bf 109 and 2 Me 410. Dragan chose only 4 planes (the minimum), arguably the best ones he has: 2 Meteors and 2 Spitefuls. I hoped that my numerical advantage (6 to 4) would be adequately used during the game. However, among my fighters there are two "second-class" ones, Me 410 heavy fighters, so I was afraid that Dragan would know how to use that fact. By the way, during WW2, all the heavy fighters that were widely praised before the war proved to be inferior in combat with single-seat single-engine aircraft, so they were mainly used as fighter-bombers and as night fighters.
I was the first to move. My fear came true, Dragan skillfully used the better service ceiling of his aircraft, flying at a safe height and attacked when it suited him. The episode lasted only 9 rounds, because all my fighters were either shot down (3 Bf 109 and 1 Me 410), damaged (1 Me 410) or withdrawn with no ammo (1 Bf 109). Dragan lost only one Meteor, the other one was only damaged, as well as one Spiteful. It is interesting that the downed Meteor was first damaged by defensive fire from a Me 410, and later finished off by a Bf 109. So, the ratio of destroyed aircraft was 4:1 for Dragan, and 1:2 in damaged ones. Note: the damaged aircraft from the first episode can participate in the third episode, because they are being repaired during the second episode.
I partially blamed my poor performance and defeat on bad luck, as my planes missed (bad dice rolls) at some key moments.
As for the rules, we both found that everything worked smoothly. Determining the probability of a hit in a specific position is simple and exact, divided into a short checklist: first it is determined whether it is A, B or C position, then the tilt of the target is considered and finally the tilt of the attacker, which all influence the firing outcome.
We concluded that 25 rounds per episode in this scenario is too much, so we reduced it to 15.
Starting positions of aircraft and their Control Panels
The first firing opportunity
Both firing procedures (targeting and firing outcome) had lucky dice rolls - the target is destroyed.
Spiteful causes tail damage to Bf 109
Meteor causes damage to Me 410, which fires back and also damages the Meteor (both suffer wings damage).
Bf 109 finishes off the damaged Meteor
Second episode
We decided to play the second episode using the optional rule "Speed Difference When Firing". I chose four Fw 190 A-8 and three Fw 190 F-8. I also reused the only undamaged fighter from the first episode - the Bf 109, which made a total of 8 fighters. Dragan surprised me again with his choice - he chose only 4 Spitfires. In this episode, I had twice as many (8:4) fighters as Dragan, of similar strength.
Dragan was the first to move. A fierce fight immediately broke out. Dragan immediately raised his fighters to maximum altitude in order to use the better ceiling of his fighters. And not only that, Dragan saw more optimal trajectories of his fighters in order to get to the most favorable firing positions. When the Spitfires were at a lower altitude, I attacked from all kinds of positions, which wasted a lot of ammunition with little effect.
The episode lasted for 10 rounds, in which all the German planes were either shot down or retreated after getting damaged. The result was disastrous for me - I had 4 destroyed and 4 damaged aircraft. Damaged fighters from the second episode cannot participate in the third, so in the next, final episode I could only count on previously unused fighters (and the one that was damaged in the first episode). Dragan had only one damaged Spitfire.
After such a fiasco, I finally concluded that bad luck was not the cause of my defeats. Choosing the right moment to attack from the best position made the difference between victory and defeat. Also, it is important to make sure that when attacking, the fighter doesn't become an easy target itself immediately after.
The optional rule "Speed Difference When Firing" works great. With the help of Speed Indicators, you can clearly see the current speed of each aircraft. A fighter currently flying at low speed cannot attack, or has a significantly lower chance of hitting fighters moving at high speed. An aircraft token that makes a turn in the last step remains banked (roll tilt). Such a position usually makes it more difficult for enemy aircraft to come in a favorable firing position. Applying these rules in the best possible way proves to be the exact principle established by the ace pilots during WW2: "Fly higher, fly faster and don't fly level". When determining the probability of hitting the opponent, the factor of the speed difference between the aircraft is added to the existing checklist, but even with that, the whole procedure remains simple.
During the game, we noticed that 23 Speed Indicators might not be enough, even with only 12 aircraft on the board. The problem is that often most aircraft fly at similar speeds, so the same speed indicators are used.
Spitfires attack from above
Each Spitfire finds its prey
Focke-Wulf strikes back
The third episode
We agreed to play the third episode with the optional rule "Inertia". All available aircraft on each side participate in this episode. I saved my best fighters for the last episode: Me 262 and Ta 152 (two of each), and from the first episode, I only had one Me 410 left, which was repaired in the meantime. So I only had 5 fighters in the final episode. On the other side, out of a total of 17 planes that each player has at his disposal, Dragan lost one fighter in the first episode (while the two that were damaged are again available), and one was damaged in the second episode (therefore not available now).
In this episode, the balance of power was 15:5 in favor of Dragan. Considering that in the previous episodes, the player who had fewer planes won, I was hoping that in this episode I would finally win, because I have a lot of potential targets. The fact that I have the fastest fighter (Me 262) gave me additional optimism. I didn't expect a total turnaround and a final victory, but at least a victory in this episode.
I was the first to move. Both sides entered the fight immediately, so there was a lot of action on the board. Throughout the game, we often used tracer bursts to increase the hit probability. This turned out to be a good practice, especially for fighters that have a lot of ammunition at their disposal (Me 410 and Fw 190).
We didn't have enough Speed Indicators, so we used small pieces of paper with a number written on them to compensate.
The episode also lasted only 10 rounds. I managed to take down as many as 4 of Dragan’s fighters, but I lost all 5 of mine, so I lost this episode as well. The total score was 33:12 for Dragan (undamaged planes bring the player 3 points each, the damaged ones from the second episode 2 points, and the ones damaged in the third episode 1 point each).
A big brawl already at the start of the game
The jet fighter (Me 262) finds its first victim. Since it has very high firepower, it used only a short burst, saving ammunition (the red slider is turned hollow side up)
A whirlwind of planes
A Tempest chases a Ta 152, while Spitfires are flying at high altitude, ready to attack.
The final conclusions after the entire game are as follows:
- turns are played out quickly, and the games are very dynamic
- in all variants played (with and without optional rules) there were no issues nor inconsistencies with the rules, everything worked perfectly
- the player who makes better decisions wins, and luck has minimal influence
- when in a good firing position, it is too easy to destroy or at least damage enemy aircraft, therefore we have adjusted the Firing Outcome Chart (which is generally possible to adjust by simply shifting the numbers, according to players' preferences)
- 23 speed markers aren’t enough, so there will be 36 in the set
- there are enough altitude stands
- a standard board of 3 bi-folds is big enough for this scenario
My fear that the game has become too complicated compared to AoD1 was unfounded. Dragan and I liked the game the most when we played with almost all the optional rules, because that way the principle of transferring the aircraft’s energy from one form to another - potential to kinetic and vice versa - comes to full effect.
Messerschmitt has high kinetic energy (speed 15), while Spitfire has high potential energy (altitude L10)
We are grateful to all the backers who during the campaign requested to somehow include the principles of inertia and energy. This motivated us to develop the game mechanics that support aircraft acceleration (instead of leaving it for some other game in the future). It took us additional time, but we are very satisfied how it turned out, and I think it was worth it.
The second game, scenario: Ramrods
For the second game, we chose the asymmetric Ramrods scenario because of its relative simplicity. Although bombing a target on the ground can give an allied player as much as 6 points (3 x 2), the emphasis is still on the dogfight. We agreed that Dragan would help me in finding the movement paths for getting in the best firing positions. I made the final decisions about how the aircraft would move, who I would attack, whether I would use tracer bursts and the like, but now, thanks to Dragan's help, the fight was much more equal.
We have used improvised chits (bombs, etc.), because they are still not produced. The serial chits will be round, not square.
I played with Allied planes and immediately directed all 3 bombers towards the target. Dragan sent his single-engined fighters towards the escort fighters, while he attacked the bombers with Me 410 heavy fighters. Only one of my bombers successfully reached the target and dropped bombs worth 2 points. In dogfights, Dragan gained an advantage of 1.5 points, so I was within reach of victory in the tenth round (with an advantage of half a point). At that moment, my remaining aircraft were close to exiting the board and ending the game. However, in that tenth round, the Spitfire (no. 3), which ran out of ammunition, was caught by an Bf 109 (no. 4) and got damaged, thus equalizing the total score in the game. Dragan had one more remaining aircraft to move, Fw 190 (no. 5) and he managed to attack the same Spitfire from above and shoot it down. With that move, he secured the victory by half a point!
What a game! Both Dragan and I were delighted by the game’s course and the exciting ending. I was a little bit sad because of the defeat at the last second, but, nevertheless, I was happy the game had such tense ending. I remembered a Facebook post from a couple of years ago where Marcelo Figueroa and Tricia Sydney showed a game of AoD1 played in an asymmetric scenario, which resulted in a draw. Both games show that in Age of Dogfights, the result of even asymmetric scenarios can be uncertain until the very end if the knowledge and skill of both players is approximately equal.
Round 2
Me 410 avoid enemy fighters and they attack bombers
Control Panels show that Spitfires were more active in combat than Thunderbolts
Only one bomber dropped its bombs on the target
The condition of Control Panels in the middle of the game
In round 10, Allied aircraft are close to leaving the board and winning by 0.5 points
Bf 109 catches up the Spitfire, causing damage
Fw 190 also fires and destroys the Spitfire, ensuring victory
The best Allied aircraft was Spitfire no. 3
The best German fighter was Fw 190 no. 5
I cannot say how long these games lasted, as it would not be relevant, due to all the additional work we did alongside. In any case, the games are dynamic, and all the turns play out quickly. If played with many aircraft, you should dedicate 2 to 4 hours for a game.
Large Caliber Anti-Aircraft Guns
over 2 years ago
– Thu, Oct 12, 2023 at 03:11:13 PM
As we announced, this update is dedicated to the rules for the effect of large-caliber AA guns. This type of weapon was not featured in the game Age of Dogfights WWI, nor announced during the Kickstarter campaign for this game, but we, the authors, consider it necessary in the final version of the rulebook. Component-wise, 3 transparent thin plastic foil sheets will be added, with printed markings, each 30 x 20 cm in size. The printing will be done soon, which we'll show in one of the next updates.
The rules are as follows:
Scenarios – last part
over 2 years ago
– Fri, Oct 06, 2023 at 05:03:11 PM
Our work on finalizing the AoD:WWII is nearing its end. The last estimate we gave regarding shipping was that it is going to start in October. That's still possible, however, a November start seems more likely.
As we announced a week ago, this update contains the last 5 Scenarios. So far, we've published 11, which makes a current total of 16. Another Scenario is in the final stages, but we will probably publish a selection of 14 or 15 in the printed Scenario booklet. All the others that have been finished will be available on our website, or featured in one of the expansions.
Among the Scenarios we are publishing now, there are three that consist of multiple (2 to 4) interdependent episodes. There is also one short scenario which, like all the previous from that category, represents a dogfight between unusual types of aircraft.
Flak Barrage
During the Combined Bomber Offensive, several hundred attacks on Berlin were carried out. The British carried out their attacks at night, and the Americans during the day. In these attacks, different numbers of aircraft participated, with various outcomes, and the losses ranging from negligible to high; however, in any case, the biggest risk for all bomber crews almost always was flying through zones covered with a heavy barrage fire from the large caliber anti-aircraft guns.
Setup
Board: 6 bi-fold segments (land).
3 Barrage Sectors, placed as shown in the diagram.
Allied aircraft:
3x B-17 G Flying Fortress, armed with bombs, starting on the board at altitude L6.
3x Lancaster B Mk I, armed with bombs, starting on the board at altitude L5.
4x Spitfire Mk IX, without any load, starting on the board at altitude L7.
4x Tempest FB Mk II, without any load, starting on the board at altitude L8.
4x P-51 D Mustang, without any load, starting on Approach Panel at altitude L9.
4x P-47 D Thunderbolt, without any load, starting on Approach Panel at altitude L9.
German aircraft:
4x Bf 109 G-6/U4, without any load, starting on the board at altitude L4, pitched up.
4x Fw 190 A-8, without any load, starting on Approach Panel at altitude L6.
2x Me 262 Schwalbe, starting on Approach Panel at altitude L3.
Specifics, Requirements and Restrictions
Barrage Sectors:
Note: German fighters should be careful if entering Barrage Sectors, as they would risk being shot down themselves.
Aircraft presence in the combat zone:
Allied bombers must not fly at altitude lower than L5 throughout the game (for optimal fuel consumption).
British fighters (Spitfires and Tempests) must not enter Barrage Sectors.
Tasks and Win Criteria
Allied bombers have the task to leave the board towards east, by the end of Round 18. British fighters have the task to escort the bombers up to Barrage Sectors, and American fighters protect them afterwards.
Allied player wins if at least 4 bombers, with no more than one Damage Marker, successfully push through to the east, by the end of Round 18.
It is a draw if 3 bombers push through in time. German player wins in all other cases.
Destroying or damaging other aircraft does not affect the outcome of the game.
The Allied player plays first. The game lasts as long as there are bombers on the board, or until Round 18.
Notes
If an add-on set of 'additional aircraft: British Bombers' or 'additional aircraft: American Bombers' is at hand,
12 bombers from the same nation can be used (because there were no combined attacks on Berlin). An additional set of Altitude Stands is recommended, to be able to support a large number of aircraft. In this case, the Allied player wins if at least 9 bombers push through, and it is a draw if 8 succeed.
Warming Up for the Final Fight
In various land, sea, and air battles, technical and numerical superiority of one of the involved parties usually leads to victory. In cases where both sides are approximately equal, in addition to the courage and skill of the participants, resource management can be crucial, especially in a long-term conflict. Sometimes the key to success is to immediately attack the opponent with all your forces, while in some cases it is necessary to limit your actions at first, and wait for that decisive battle that is yet to follow.
During the Battle of Britain in 1940, both sides had approximately equal numbers of fighters of similar quality, with pilot training and motivation at high levels. The winners were the British, whose commanders (Hugh Dowding and Keith Park) carefully engaged their forces at the beginning to save as many fighters as possible for the decisive encounter that was expected at the time, the German invasion of Britain. That invasion never happened, precisely because the Germans failed to achieve air superiority over Britain.
This scenario represents the simplest dogfight, without any other tasks, divided into multiple stages – episodes.
Both players have an equal number of aircraft, 17 British vs 17 German fighters, and the key is that the players themselves decide how many and which aircraft types will participate in which episode.
Setup
All three episodes are played on the basic board, consisting of 3 bi-fold segments (land or sea), with optional Weather Markers of choice.
At the beginning of each episode, all British aircraft are placed along the western edge, and all German aircraft along the eastern edge of the board. Aircraft can be attached to Altitude Stands of any height up to L6, but each aircraft type must be on a different height (for each player separately).
Episode 1:
Both players first decide and write down the designation numbers of the aircraft that will partitipate in the first episode, in such a way that the opponent does not see that list. Each player may choose minimum 4 and maximum 10 aircraft. Player can choose between the aircraft listed below.
British: 4x Spitfire Mk IX, 4x Tempest FB Mk II, 2x Meteor Mk III, 2x Beaufighter Mk VI, 3x Typhoon Mk I B, 2x Spiteful
German: 4x Bf 109 G-6/U4, 4x Fw 190 A-8, 2x Me 262 Schwalbe, 2x Me 410 Hornisse, 3x Fw 190 F-8, 2x Ta 152
Episode 2:
Before the start of the second episode, players again make a list of their aircraft, without letting their opponent see it. Players can choose the same aircraft as in the previous episode, except those that were either damaged or destroyed in the first episode. Each player must choose minimum 4 aircraft, but must leave out at least 2 aircraft that did not participate in episode 1 (to keep them unused until the final episode).
Episode 3:
For the third, decisive episode, all available aircraft can participate, if either:
- did not participate in the first two episodes
- have not received any damage
- received damage in the first episode (with Damage Markers removed, as they were repaired in the meantime)
Specifics, Requirements and Restrictions
All aircraft start the game on the board and individual aircraft do not have a limit by which they must leave the board, but the overall game duration limit is 25 Rounds for each episode.
Only damaged aircraft may leave the board.
Tasks and Win Criteria
Each player has the task to preserve as many fighters in good condition, to be ready for upcoming battles, and to reduce the number of enemy aircraft.
Two extremely different strategies are:
The first consists of employing a minimum number of fighters in the first two episodes in order to save most of them for the third, decisive battle. In that case, there is a risk that those few fighters in the first two episodes will all be destroyed without inflicting much damage themselves if the opponent engages much stronger forces, so they would enter the third episode weakened.
The second approach would be to deploy the maximum number of aircraft in each episode. In that case, if the numerical advantage in the first two episodes is not used adequately, the opponent might manage to preserve more aircraft for the third episode and then win the entire Scenario.
The winner is determined by counting points:
- Survived undamaged aircraft: 3pts each
- Aircraft damaged in the second episode: 2pts each
- Aircraft damaged in the third episode: 1pt each
Aircraft that were damaged in the second episode will soon be repaired, thus they are more valuable that those that are damaged later, in the third episode, which will take more time to be ready for battle again.
One player plays first in Episode 1 and 3, and the other player plays first in the Episode 2. Each episode lasts as long as there are aircraft of both sides on the board, or until Round 25.
Notes
Since a large number of aircraft participate in this Scenario, it is recommended to use an additional set of Altitude Stands, if available.
Operation 'Crossbow'
During 1943, the Allies received intelligence that the Germans were working on a long range reprisal weapons program (V-1 and V-2). At the end of that year, they launched a large strategic operation 'Crossbow', which consisted of bombing attacks on development centers, production facilities, transport and launch pads of V missiles. This Scenario depicts one such attack in two episodes. In the first episode, echelons of Allied fighter-bombers attack anti-aircraft guns near a V-missile production facility, in order to make possible for heavy bomber to attack it, in the second episode. As the factory is located underground, under thick concrete, the attack is performed by three modified Lancaster bombers, each carrying a huge 'Tallboy' bomb.
Episode 1: Echelons
Setup
Board: 6 bi-fold segments (land).
Task Markers: 1 orange rectangular marker and 6 purple point markers, placed as shown in the diagram.
AA Gun Markers: 8 orange and 3 purple.
One Barrage Sector (placed under all other markers).
Allied aircraft:
2x Beaufighter Mk VI, armed with rockets, starting on the board at altitude L3.
2x Supermarine Spiteful, armed with rockets, starting on the board at altitude L3.
3x Typhoon Mk I B, armed with bombs (2x Power 50), starting on the board at altitude L4.
4x Tempest FB Mk II, armed with bombs (Power 50), starting on the board at altitude L5.
4x Spitfire Mk IX, without any load, starting on the board at altitude L6. One of them has an Ace pilot.
German aircraft:
4x Bf 109 G-6/U4, without any load, starting on the board at altitude L7. Two of them have Ace pilots.
2x Ta 152, starting on the board at altitude L8. One of them has an Ace pilot.
Specifics, Requirements and Restrictions
Point Task Markers represent fortified large caliber anti-aircraft guns. AA Gun Markers represent small caliber anti-aircraft guns. Their Durabilities are:
Each Typhoon can drop bombs of Power 50 twice, on two different targets.
The Zone Target can only be destroyed by a large bomb carried by bombers in the second episode of this Scenario, therefore its Durability value is irrelevant for now.
Both orange and purple AA Guns are German, with the following values:
Barrage Sector:
* The number of shots per Round corresponds to the number of Point Targets. For each destroyed Point Target, the number of shots is reduced by one, from the following Round.
Aircraft presence in the combat zone:
Individual aircraft do not have a limit by which they must leave the board, but the overall game duration limit is 20 Rounds.
All aircraft are permitted to leave the board at any time (as soon as completing their task, or if players consider they have achieved enough advantage already).
Tasks
British aircraft have the primary task to destroy as many large caliber anti-aircraft guns (Point Targets) as possible. A secondary task is to disable as many enemy fighters as possible (destroy or damage).
Destroying large caliber anti-aircraft guns creates more favorable conditions for bombers in the next episode to perform their task.
Aircraft armed with rockets are most suitable for destroying small caliber AA Guns and thus opening a path for other aircraft. Bombs are more suitable for destroying Point Targets, as a single hit is enough per target.
The German fighters have the task to protect their anti-aircraft guns.
All German aircraft that have survived undamaged at the end of the first episode will participate in the second.
Although their task is to prevent British aircraft from destroying ground targets, German fighters should take care not to receive damage, as they will be needed later.
The British player plays first. This episode lasts as long as there are British aircraft on the board, or until Round 20.
Episode 2: Tallboy
Setup
Board with remaining Task Markers and AA Gun Markers (those that are not destroyed) are the same as at the end of Episode 1.
Allied aircraft:
4x P-51 D Mustang, without any load, starting on the board at altitude L8. One of the pilots is an Ace, and one is a Rookie.
4x P-47 D Thunderbolt, without any load, starting on the board at altitude L7. Two of them have a Rookie pilot.
3x Lancaster B Mk I*, armed with a bomb (Power 500), starting on the board at altitude L5.
* modified in order to be able to carry a large bomb – a part of the defensive machine guns and armor had to be removed. Changed characteristics are:
German aircraft:
4x Fw 190 A-8, starting on the board at altitude L6. Two of them have a Rookie pilot.
All aircraft that were not destroyed nor damaged in the first episode, with their ammunition and number of full throttles restored:
Up to 4 Bf 109 G-6/U4, without any load, starting on the board at altitude L4.
Up to 2 Ta 152, starting on the board at altitude L5.
If one of the German aircraft has shot down three enemy aircraft in the previous episode, the pilot will be an Ace in the second episode (even if he was not already).
Specifics, Requirements and Restrictions
Zone Target represents the underground factory. AA Gun Markers represent small caliber anti-aircraft guns. Their Durabilities are:
Point Task Markers represent large caliber anti-aircraft guns, which cannot be destroyed in this episode (there are no aircraft that carry suitable weapons) therefore their Durability is irrelevant.
Both orange and purple AA Guns are German, with the following values:
Barrage Sector:
* The number of shots per Round corresponds to the number of Point Targets on the board (those that survived the previous episode).
Aircraft presence in the combat zone:
The bombers must drop bombs from level flight, from altitude L5.
Individual aircraft do not have a limit by which they must leave the board, but the overall game duration limit is 12 Rounds.
Tasks and Win Criteria
The bombers have the task to destroy the factory. American fighters are providing protection for bombers. German fighters must intercept all the bombers before they drop the bombs.
The Allied player wins the Scanario if the Zone Target is destroyed by the end of Round 12 (a single hit by a 'Tallboy' bomb is enough). Otherwise, the German player wins.
The Allied player plays first. This episode lasts as long as there are Allied aircraft on the board, until the target is destroyed or until Round 12.
Clear the Skies
Due to constant attacks by the Allies on airfields and infrastructure of the Luftwaffe in the last phase of the war, the Germans built several hundred improvised and well-camouflaged airfields. They constantly moved their squadrons or smaller groups of planes from one airfield to another, which is why the Allies scouted German territory intensively, to determine which airfields were active. The Germans had perfected camouflage, which made a simple fly-over by a scout plane often ineffective. The best results were achieved by scouts flying at low altitudes, but these actions were high-risk due to the possible effect of hidden AA guns. Aerial photography from high altitudes was safer, in which cases the photos were urgently sent for analysis, because a long wait would give the Germans a chance to move their aircraft in the meantime. If the aero-photo interpreters found that hidden planes were visible in the photographs of an airfield, fighter-bomber aircraft would be sent urgently to attack them.
This complex Scenario is played out in four episodes: Reconnaissance, Attack, Breakthrough and Bombing. Each episode is a separate game, but they are interdependent, and the winner is determined only at the end of the fourth episode.
In the first episode, British reconnaissance aircraft are tasked with taking aerial photographs different locations that are supposed to be hiding a group of camouflaged German fighters.
In the second episode, British fighter-bombers have the task of attacking the airfield where German aircraft are hidden. If the reconnaissance was successful in the previous episode, the location of camouflaged German aircraft is precisely known.
In the third episode, a group of American bombers accompanied by fighters has the task of breaking through to the east. Depending on the success of British attack in the previous episode, the American bombers are intercepted by a small or a large number of German fighters.
In the fourth episode, the American bombers have the task of bombing a very important target in the German background – an aircraft engine factory. Success odds depend on the number of bombers and escort fighters that managed to break through in the previous episode.
This scenario represents the late years of aerial warfare on the Western Front in a nutshell.
Episode 1: Reconnaissance
Setup
Board: 4 bi-fold segments (land), with 5 Terrain Markers (optional).
Task Markers: 3 orange rectangular markers, placed as shown in the diagram.
AA Gun Markers: 8 orange and 4 purple.
British aircraft:
2x Mosquito PR Mk 34, starting on the board at altitude L9.
German aircraft:
2x Ta 152, starting on the board at altitude L6, pitched up. One of them has an Ace pilot.
Before the start of the game, the German player should write down a symbol (circle, triangle or square) of the Task Marker where the camouflaged fighter aircraft are hidden, in such a way that the opponent cannot see it.
Specifics, Requirements and Restrictions
Both orange and purple AA Guns are German, with the following values:
Aircraft presence in the combat zone:
Tasks
The two British reconnaisance aircraft have the task to take photos of the enemy airfields (rectangular Task Markers) and return to their base – leave the board to the west, by the end of Round 16. The airfields must be photographed from altitude L9.
If a reconnaisance aircraft receives a 'green' or 'red' damage, it will not be able to complete its mission ('green' = damaged engine which makes it unable to return to the base in time, 'red' = destroyed camera).
The goal of reconnaisance is to discover in which of the three Zone Targets the camouflaged German fighters are located. For each photographed Zone Targets (if one or both aircraft take a photo and succesfully return in time), the German player must say at the end of the episode whether camouflaged fighters are there or not.
In order to know the location of camouflaged German fighters for sure, it is enough to take photos of two Zone Targets (if the fighters are in neither of the two, then they must be in the third). If only one Zone Target is photographed, with some luck, it can be enough to know the location of camouflaged fighters (if they happen to be right there), or at least the British player will know that they are in one of the other two.
The information about the location of the camouflaged German aircraft is crucial for the second episode of the Scenario.
The German fighters have the task to shoot down enemy aircraft, or prevent them from completing their task in time.
The British player plays first. This episode lasts as long as there are British aircraft on the board, or until Round 16.
Notes
If only 3 bi-fold board segments are available, the board setup can be adjusted accordingly by omitting the left bi-fold, and the time by which British aircraft must return should be Round 12.
If players want, more aircraft can participate in this episode, see Optional Modification on page __.
Episode 2: Attack
Setup
Board, Task Markers and AA Gun Markers are the same as in Episode 1.
British aircraft:
2x Tempest FB Mk II, armed with bombs (Power 50), starting on the board at altitude L6.
2x Tempest FB Mk II, armed with rockets, starting on the board at altitude L6.
3x Typhoon Mk I B, armed with bombs (Power 100), starting on the board at altitude L4.
2x Beaufighter Mk VI, armed with rockets, starting on the board at altitude L3.
4x Spitfire Mk IX, without any load, starting on the board at altitude L8. Two of them are Rookie pilots.
German aircraft:
4x Bf 109 G-6/U4, without any load, starting on the board at altitude L7. Two of them are Ace pilots.
All British aircraft in this episode start the game along the western edge of the board, and all German aircraft along the eastern edge:
Specifics, Requirements and Restrictions
Target Durabilities are:
Both orange and purple AA Guns are German, with the following values:
Aircraft presence in the combat zone:
Tasks
British aircraft armed with bombs have the task to destroy the airfield with camouflaged German fighters (Zone Target). British aircraft armed with rockets are tasked with attacking the AA Guns and thus make it easier for the bomb-carrying aircraft to perform their task. Spitfires are there to provide fighter support. Any aircraft can also attack the AA Guns by strafing.
If at the end of the first episode the British found out in which zone the planes were hidden, they would concentrate their attack on that zone. If they have not found out which zone it is, then they can choose to either attack all three zones and thus spread the bombs they carry between the zones, or take a risk and attack only one zone, which they assume is hiding German fighters.
The German fighters' priority is to prevent the British from destroying the Zone Target with camouflaged aircraft.
If still hidden, the information written down before the start of Episode 1 is not revealed until the end of this episode. Only hits to the Zone Target hiding camouflaged German fighters matter (any hits to the other two Zone Targets are irrelevant). The total Power value of hits influences how many of the hidden aircraft (up to 6, four Fw 190 A-8 and two Me 262 Schwalbe) will survive to be able to participate in the next episode:
For each Power 50, one aircraft is destroyed (e.g. if total Power value is 200, 4 aircraft are destroyed, and if it is 300 or more, all 6 aircraft are destroyed). If the total Power value is less than 300, it remains to determine which of the 6 aircraft are destroyed. Since the aircraft were well camouflaged, the choice is random (for example, take the 6 aircraft tokens and choose without looking).
The outcome of the second episode largely conditions the setting of the third one. If the British manage to completely or at least partially destroy the airfield with German fighters, they have a much better chance of winning the whole game.
The British player plays first. This episode lasts as long as there are aircraft on the board.
Episode 3: Breakthrough
Setup
Board with remaining AA Gun Markers (those that are not destroyed) are the same as at the end of Episode 2.
In this episode, the Americans take part on the allied side, instead of the British.
American aircraft:
4x P-51 D Mustang, with a fuel tank, starting on the board at altitude L6. Two of them are Rookie pilots.
2x P-38 L Lightning, with a fuel tank, starting on the board at altitude L7.
3x B-25 J Mitchell, armed with bombs (Power 150), starting on the board at altitude L4.
2x F-3A Havoc*, armed with bombs (Power 100), starting on the board at altitude L5.
* acting as bomber version of the aircraft, A-20, with all the same characteristics except it can carry bombs (with no performance penalty with load) and has defensive machine guns:
All American aircraft in this episode start the game along the western edge of the board:
German aircraft:
2x Ta 152, starting on the board at altitude L6, pitched up (the same position as in Episode 1). These are the same aircraft that participated in the first episode (one of them is an Ace).
Depending on the outcome of the previous episode:
Up to 2x Me 262 Schwalbe, starting on the board at altitude LL, pitched up. One of them has an Ace pilot*.
Up to 4x Fw 190 A-8, starting on the board at altitude LL, pitched up. Two of them have an Ace pilot*.
* If some aircraf are destroyed, the remaining aircraft are piloted by Aces. But, pilots cannot use different aircraft type (e.g. if two Me 262 and no Fw 190 survived, only one pilot will be an Ace).
Their tokens are placed on points adjacent to the rectangular Task Marker where they were hidden, for example:
Specifics, Requirements and Restrictions
Both orange and purple AA Guns are German, with the following values:
Aircraft presence in the combat zone:
Tasks
American aircraft (both bombers and fighters) have the task is to break through the German defense towards east.
Bombers will participate in the fourth episode only if they exit the board through the eastern edge by the end of Round 15, without any damage (all aircraft have orders to return if damaged).
Fighters will participate in the fourth episode only if they exit the board through the eastern edge by the end of Round 18, without any damage and with external fuel tank.
American fighters are expected to engage in combat with German fighters, and they have a choice: to fight with external fuel tank (with reduced performance) or drop the tanks but thus not be able to continue their escort mission (in Episode 4). Perhaps the best choice is that part of the fighters drop their tanks, and others not.
The American player plays first. This episode lasts as long as there are aircraft on the board.
Episode 4: Bombing
This episode takes place a few hundred kilometers away from the location where the three previous episodes took place.
Setup
Board: 4 bi-fold segments (land).
Task Markers: 1 rectangular marker.
AA Gun Markers: 5 orange and 2 purple.
American aircraft:
All bombers that successfully left the board (undamaged) in the previous episode.
All fighters that successfully left the board (undamaged and with external fuel tank) in the previous episode. In this episode they start without external tanks (they dropped them in the meantime), and with the same conditions as they finished the previous episode (amount of ammunition and number of full throttles).
German aircraft:
2x Me 410 Hornisse, without any load, starting on the board at altitude L5.
Specifics, Requirements and Restrictions
Target Durabilities are:
Both orange and purple AA Guns are German, with the following values:
The assumption is that all aircraft have enough fuel to fulfill their tasks, but the overall game duration limit is 17 Rounds.
Tasks and Win Criteria
American bombers have the task to destroy the factory. American fighters are providing protection for bombers, and optionally they can attack enemy AA Guns by strafing, to clear a path and thus enable bombers to drop bombs from lower altitude with higher hitting probability.
German fighters must intercept the bombers before they bomb the factory.
Two German fighters can be quite enough to protect the factory, if facing only a few bombers without a fighter escort. On the other hand, if majority of American aircraft managed to break through in the previous episode, their chance to stop the American attack can be hopelessly weak.
The Allied player wins the Scanario if the Zone Target is destroyed by the end of Round 17. Otherwise, the German player wins.
The target can be destroyed by two hits of Power 150, or one 150 and one 100. If the Americans do not have bombers carrying enough total Power value in bombs at the start the fourth episode, the German player has already won the entire game, even before the start of the last episode.
The American player plays first. This episode lasts as long as there are aircraft on the board, until the target is destroyed or until Round 17.
Notes
If only 3 bi-fold board segments are available, the board setup can be adjusted accordingly by omitting the left bi-fold, and the time limit should be Round 14.
Optional Modification
The Allied player may choose to use up to 2 Spitfires for escorting Mosquitos in the first episode (starting anywhere along the western edge of the board, at any altitude level), but then those aircraft will not participate in the second episode. As an answer to this, the German player may use up to 2 Bf 109 fighters in the first episode (starting on the eastern edge, any altitude level), instead of the second episode. In this case, all German aircraft from the first episode will participate in the third episode (starting on the eastern edge, any altitude level), but only those that survive undamaged.
Operation 'Sausage'
After the German occupation, many French people joined the resistance movement, which contributed in various ways to the Allied fight against fascism. One of the notable activities was hiding and protecting valuable works of art from the Germans, who had the intention to steal them. This short scenario describes one such action.
A group of members of the resistance movement has prepared a shipment containing, among other things, important intelligence papers and a painting, hidden in a sausage, that they want to send by plane to Great Britain. During the night, two liaison aircraft come to pick up the package and and land at the agreed point. Due to unforeseen circumstances, the return flight takes place in the morning, so there is a possibility for the German fighters, that happen to be nearby on a training flight, to intercept and shoot them down.
Setup
Board: 6 bi-fold segments (3 land, 1 coast and 2 sea), with 8 Terrain Markers, placed as shown in the diagram.
Weather Markers: 8 clouds covering altitude L3. Area corners mark fog, covering altitude LL–L1, as shown in the diagram.
British aircraft:
2x Lysander Mk III, without any load (the shipment weight is negligible), starting on the board at altitude L1.
2x Meteor Mk III, starting on Approach Panel at altitude L7.
German aircraft:
2x Me 410 Hornisse, without any load, starting on the board at altitude L45. Both of them are Rookie pilots.
Before the start of the game, the British player writes down which of the two Lysanders carries the sausage (with hidden papers and a painting), in such a way that the opponent cannot see it.
Specifics, Requirements and Restrictions
Aircraft presence in the combat zone:
The Meteors must not fly over land (eastern part of the board) at any point during the game (pilots have strict orders not to fly over the French mainland, in the case they get shot down, to prevent the aircraft falling into the hands of German engineers, who would then have an insight into the British jet engine technology).
Tasks and Win Criteria
Lysanders have the task to leave the board in the west direction by the end of Round 16 (if they are late, they will not have enough fuel to reach the English coast). Meteors are tasked with helping Lysandersescape German fighters (they just entered in service and happened to be patrolling over southeast England).
Me-410s have the task to destroy the Lysanders, or prevent them from escaping in time.
If both Lysanders escape in time (Round 16), the British player wins. If only one escapes, the hidden information is revealed, and if the sausage was in it, the British player wins. Otherwise, or if both Lysanders fail to escape, the German player wins.
Two kinds of British aircraft take part in the Scenario: very slow but agile Lysanders in the main role, and very fast jet fighters. On the German side, there are the robust Me-410 heavy fighters, which are somewhere in between in terms of maximum speed.
The slow Lysanders have a difficult task in making their way to the west. Their excellent agility can help them, especially if they fly low between the mountains, and also use clouds and fog as a temporary shelter. Lysanders have both defensive and offensive machine guns, so they can defend themselves and even try to actively fire at the German fighters. If they get a hold of the sea, they can be assisted by Meteors.
Destroying or damaging other aircraft does not affect the outcome of the game.
The British player plays first. The game lasts as long as Lysanders are on the board, or until Round 16.
Small Caliber AA Guns
over 2 years ago
– Sat, Sep 30, 2023 at 09:18:44 AM
In the past month, we had some unforeseen circumstances that hindered our work for a week, but in the meantime, everything has been resolved. In order to continue with the practice of publishing at least one update every month, we present you the rulebook text that explains the actions of small caliber AA guns. In a few days, we will publish an update with 5 more scenarios, three of which will consist of several interdependent episodes. After that one, the following will contain the rules text related to the large caliber AA guns.
When writing the rules for this chapter, we made an effort to balance the probability of AA guns destroying aircraft to the probability of aviation destroying the AA guns. We know from history that AA guns improved significantly during the war, so much that they posed a great danger to aircraft. Although in this game the AA guns are acting passively, in the break action (if the enemy aircraft enter their range) the players have an active role; for example, if several enemy aircraft come within range of an AA gun in one turn, the player must choose which one to shoot at with that AA gun. The choice may be to fire at the plane most likely to be shot down, or, on the other hand, at the most dangerous plane (the one carrying bombs or in a favorable position to carry out its mission). In any case, the AA guns add an extra layer of realism to the game. Destroying targets on the ground by aviation is much more demanding when those targets are protected by AA guns.
As we've already said, in the next ten days, you can expect two more updates. In the first one, we will publish 5 more scenarios, which will together with the 11 so far published scenarios make up the Scenario Book (which is more than announced). The second one will show rules for large caliber AA guns, which are mostly written.
New Kickstarter project in collaboration with Spieltrieb: FLYING SAUCERS
On this occasion, we would like to announce another Kickstarter project for one of our games. This time, the campaign will be completely managed by our associates and friends from Germany, from the company Spieltrieb. This update serves only as a short announcement, as one of the following updates will contain more details about this game, which we, the authors, consider to be one of our best.
In the following years, the game was further refined. The first major improvement happened before our first participation at an international festival, which was the Board Games Festival in Cannes in 2013.
At the festival, the game received a very positive feedback, so we continued working on further improvements and made several smaller series for domestic market, as well as in French and English.
At the time when we were looking for a way to present our games on Kickstarter, we came into contact with Mr. Till Meyer, the founder and owner of the German board game company Spieltrieb. He immediately recognized our potential as authors, and we agreed to begin our cooperation with a game that does not have a war theme, which was Flying Saucers. The game then had a basic level, and another level with additional types of flying saucers. The main goal of the game was the destruction of the opponent's main saucer - the Generator.
After receiving the prototype, Mr. Till spoke highly of the game and asked us to expand the story, to make the game more meaningful. In around two weeks with the inspiration blooming, we made two more extensive levels that change the original outlook of the game in many ways. A prototype of that new version was soon sent to Germany.
A redesigned prototype, divided into basic game + expansion, was shown at the Essen Spiel in 2019, where we were present as guests at the Spieltrieb booth.
We then agreed to launch the Kickstarter campaign in 2020, but the pandemic ruined everyone's plans. Now we can announce with great satisfaction and optimism that the campaign will most likely start in November 2023. In the meantime, a new game page is opened on BGG.
We will publish more details about the game in a dedicated update, when we acquire new information about the details of the campaign itself from our partners. We are very proud of this game and we feel it is on par with our best games released to date (Tank Chess and the Age of Dogfights series). In this case, the campaign, subsequent production and distribution will be managed completely by a German company, so there will be no issues related with us being in a country outside the EU. Also, the rules have already been written and tested a long time ago, and finalization and translations will be handled by Spieltrieb. We would be extremely grateful if you would follow this project and later support it during the Kickstarter campaign:
Rockets and Torpedoes + more scenarios
over 2 years ago
– Thu, Aug 31, 2023 at 11:09:27 AM
Since the last update, the chapter 5. Air-to-Surface Attacks has been completed, concluding with the last two titles 5.5. Rocket Launching and 5.6. Torpedo Launching.
During the work on this chapter, we decided to add another rule, Parallel Shifts, under chapter 3. Aircraft Movement. This maneuver can be performed by all aircraft, regardless of size and category.
Scenarios
In this update, we’ll present two more scenarios that are going to be featured in the booklet.
Heavy Water
During WWII, the Allies made great efforts to prevent Germany from building an atomic bomb. One way of doing that was to prevent the production and transport of heavy water from Norway. A significant contribution to this goal was made by bomber aviation, which on several occasions bombed transport and production facilities (such as the Vemork hydroelectric plant), as well as the Norwegian resistance movement, which carried out a series of sabotages.
In this imaginary scenario, the British aircraft are tasked with sinking two transport ships loaded with barrels of heavy water. The ships sail along the Norwegian coast, accompanied by three warships. The British send everything they have available at that moment to attack the ships, but the problem is that they come from distant airfields, so they have very little time to complete their mission.
Setup
Board: 4 bi-fold segments (water).
Task Markers: 3 purple ships and 2 orange ships (small and medium). Placed as shown in the diagram.
German aircraft:
4x Fw 190 A-8, without any load, starting on the board at altitude L6, as shown in the diagram.
2x Ta 152, without any load, starting on the board at altitude L9.
British aircraft:
4x Spitfire Mk IX, without any load, starting on the board at altitude L6.
3x Blenheim Mk IV, armed with bombs, starting on the board at altitude L6.
3x Typhoon Mk I B, armed with rockets, starting on Approach Panel at altitude L5.
3x Fairey Swordfish, armed with torpedoes, starting on Approach Panel at altitude L3.
2x Beaufighter Mk VI, armed with bombs, starting on Approach Panel at altitude L4.
Specifics, Requirements and Restrictions
All five ships are German. Orange markers represent cargo ships, and purple ones represent warships. Their Durabilities are:
All warships have anti-aircraft guns, acting all around the ship (see 6.1.2. on page __ in the Rulebook), with the following values:
Aircraft presence in the combat zone:
Beaufighters must use Skip Bombing technique when attacking the ships.
Tasks and Win Criteria
Four British strike groups have a task to destroy enemy cargo ships. Spitfires provide fighter protection to the strike groups. German fighters have a task to protect the ships.
British player wins if both cargo ships (orange markers) are destroyed.
German player wins if both cargo ships survive.
If only one cargo ship is destroyed, the winner is determined by counting points:
- Destroyed enemy aircraft: 1pt each
- Damaged enemy aircraft: 0.5pts each
- Destroyed enemy warships: large 5pts, medium 4pts, small 3pts.
The British player plays first. The game lasts as long as the British have aircraft on the board, or until Round 24.
Notes
If only 3 bi-fold board segments are available, the board setup can be adjusted accordingly, and the time by which each aircraft group must return should be reduced by 3 Rounds.
Dunkirk
The famous evacuation of British soldiers from France took place at the end of May 1940, so the appropriate aircraft for this scenario would be those from the Battle of Britain expansion. However, the scenario is featured in the base game because of its distinctiveness, so that all the base game owners could enjoy it.
Setup
Board: 4 bi-fold segments (three water and one coast).
Task Markers: 13 orange and 6 purple area corners, 3 orange and 3 purple ships. Area corners are placed in such a way that some of them are pointing towards east and some towards west, as shown in the diagram.
The exact position of Task Markers on the board is not of crucial importance.
British aircraft:
4x Spitfire Mk IX, without any load, starting on the board at altitude L5, as shown in the diagram.
2x Beaufighter Mk VI, without any load, starting on Approach Panel at altitude L4.
4x Tempest FB Mk II, without any load, starting on Approach Panel at altitude L5.
2x Supermarine Spiteful, without any load, starting on Approach Panel at altitude L6.
German aircraft:
3x Ju 87 D-5 Stuka, armed with bombs, starting on the board at altitude L6.
4x Bf 109 G-6/U4, without any load, starting on the board at altitude L6.
3x Ju 188, armed with bombs, starting on Approach Panel at altitude L7.
4x Fw 190 A-8, armed with bombs, starting on Approach Panel at altitude L4.
2x Me 410 Hornisse, armed with bombs, starting on Approach Panel at altitude L4.
Specifics, Requirements and Restrictions
All Task Markers are British vessels. Orange ship markers and area corners represent civilian ships and boats. Purple markers represent warships and military boats. Their Durabilities are:
Note that civilian boats have very low Durability, so they can also be sunk by strafing.
All purple vessels have anti-aircraft guns, acting all around the vessel (6.1.2. on page __ in the Rulebook), with the following values:
Aircraft presence in the combat zone:
Tasks and Win Criteria
All ships and boats (both military and civilian) are on a mission to evacuate British soldiers. Those facing east (towards the coast) are still empty, while those facing west have soldiers on board.
German aircraft are tasked with sinking as many enemy vessels as possible, which are protected by British fighters.
The winner is determined by counting points.
German player counts the following:
- Destroyed enemy aircraft: 1pt each
- Damaged enemy aircraft: 0.5pts each
- Destroyed boats facing east(empty), both military and civilian: 1pt each
- Destroyed boats facing west(with soldiers), both military and civilian: 2pts each
- Destroyed civilian ships: small (with soldiers) 4pts, medium (with soldiers) 6pts, large (empty) 4pts.
- Destroyed warships: small (empty) 2pts, medium (empty) 3pts, large (with soldiers) 8pts.
British player counts the following:
- Destroyed enemy aircraft: 1pt each
- Damaged enemy aircraft: 0.5pts each
- Saved vessels (partially damaged ones still count): same as above (depending on vessel size and whether it has soldiers on board).
The British player plays first. The game lasts as long as there are aircraft on the board, or until Round 30.
Notes
If only 3 bi-fold board segments are available, the Task Markers should be reduced in number and rearranged accordingly, and the time by which each aircraft group must return should be reduced by 3 Rounds.
If Battle of Britain expansion is at hand, the following aircraft can be used:
Spitfire Mk I instead of Spitfire Mk IX
Beaufighter Mk I instead of Beaufighter Mk VI
Hurricane Mk I instead of Tempest FB Mk II
Spitfire Mk II instead of Supermarine Spiteful
Ju 87 B-2 Stuka instead of Ju 87 D-5 Stuka
He 111 instead of Ju 188
Bf 109 E-4 instead of Bf 109 G-6/U4
Bf 109 E-7 instead of Fw 190 A-8
Bf 110 C instead of Me 410 Hornisse
———————————————————————————————————
The scenario booklet will contain a total of 10 different Scenarios (five scenarios were published in the Update #35), and the three remaining ones are in the final stages. Most of them are inspired by a historical battle which features a lot of aircraft. These Scenarios have relatively complex tactical situations, as many groups of aircraft subsequently enter the fight, so players have to plan well ahead in order to defeat the opponent.
Since the base game alone features many types of aircraft, and especially when counting all the expansions, we assume that gamers will want to try different types of aircraft in dogfights in simple encounters (2vs2 or 3vs3 and similar). It is assumed that only fighters (and fighter-bombers) should participate in a pure dogfight, however, there were situations when light scouts, multi-engine bombers, four-engine patrol aircraft, etc. fought each other in WWII. Therefore, the Scenario Book will contain a couple of simple Scenarios with the main emphasis on the dogfight of different categories of non-fighter aircraft. There will most likely be 4 short Scenarios of this kind in the base game, and each of the expansions will also contain a few.
‘Heavyweight Class’ Dogfight
Two German Condors (Fw 200) fly towards the British ships in order to carry out the bombing. The pilots of the British Halifax patrol aircraft that are nearby, see the enemy, and they decide to drop their bombs in order to make themselves less heavy and to start attacking the enemy aircraft. The Condors have enough time to drop their bombs on the ships, and then get into a dogfight with the attackers. Both sides call for help, but at that moment only two Do-24 seaplanes and a Sunderland aircraft patrolling nearby can join the battle. A heavyweight dogfight develops in the cloudy sky above the Atlantic, four against three.
Setup
Board: 3 bi-fold segments (water).
Task Markers: 2 orange ships (small and medium), placed as shown in the diagram.
Weather Markers: 8 clouds covering altitude L3–L4, placed as shown in the diagram.
German aircraft:
2x Fw 200 Condor, with bombs, starting on the board at altitude L4, as shown in the diagram.
2x Do 24, without any load, starting on Approach Panel at altitude L5.
British aircraft:
2x Halifax GR Mk V, without any load, starting on the board at altitude L5.
1x Sunderland Mk III, without any load, starting on Approach Panel at altitude L5.
Specifics, Requirements and Restrictions
Aircraft presence in the combat zone:
German aircraft must leave the board through the eastern half of the southern board edge (marked black in the diagram). British aircraft must leave the board through the eastern half of the northern board edge (marked blue in the diagram).
Aircraft must not leave the board earlier than Round 16, except if damaged.
All aircraft are permitted to actively attack other aircraft, even without using rule 4.7. Speed Difference When Firing (page __ in the Rulebook), as all aircraft in this Scenario are equally slow.
Tasks and Win Criteria
All aircraft have a task to attack enemy aircraft. Before engaging in dogfight, both German Fw 200 Condor must first drop their bombs on any of the two ships.
The winner is determined by counting points.
- Destroyed enemy aircraft: 2pts each
- Damaged caused to enemy aircraft: 0.5pts per Damage Marker
- Bombing: 2pts per hit (ship Durability is not specified because it does not matter)
The German player plays first. The game lasts as long as there are aircraft on the board, or until Round 26.
‘Featherweight Class’ Dogfight
This dogfight could be taking place somewhere in the skies over France in May 1940. In the early evening, two British Fairey Battle bombers return from a bombing mission with no bombs left, and encounter two German Fw 189 aircraft returning to their base after completing their scouting mission. Both British and German pilots, all eager for the glory of fighter pilots, engage in dogfight. Two more pilots who were on observation missions nearby join the battle, in aircraft of similar category: British Lysander and German BV 141. A 3-on-3 fight develops, where pilots from both sides hope for victory, medals, and glory.
Setup
Board: 3 bi-fold segments (land), with 6 Terrain Markers, placed as shown in the diagram.
2x Fairey Battle, without any load, starting on the board at altitude L4, as shown in the diagram.
1x Lysander Mk III, without any load, starting on Approach Panel at altitude L4.
German aircraft:
2x Fw 189 Uhu, without any load, starting on the board at altitude L3.
1x BV 141, without any load, starting on Approach Panel at altitude L5.
Specifics, Requirements and Restrictions
Aircraft presence in the combat zone:
Aircraft may only leave the board if they are either damaged or have run out of ammunition.
All aircraft are permitted to actively attack other aircraft, even without using rule 4.7. Speed Difference When Firing (page __ in the Rulebook), as all aircraft in this Scenario are equally slow.
Tasks and Win Criteria
The winner is determined by counting points.
- Destroyed enemy aircraft: 1pt each
- Damaged enemy aircraft: 0.5pts each
The British player plays first. The game lasts as long as there are aircraft on the board, or until Round 20.
Fat vs Skinny
Two B-17 bombers got separated from the rest of the group during the bombing of targets in Germany and are independently returning to their base in Great Britain. They were not attacked by fighters, so they’re undamaged, and they carry all the ammunition for the defensive machine guns they’re equipped with. During the flight, they notice far below them a German liaison aircraft, Fi 156 Storch, preparing to land on a clearing in a forest. Eager to make themselves heroes by shooting down an enemy plane that might have a high-ranking officer on board, both pilots of the Flying Fortresses head towards the enemy.
The German pilot abandons the idea of landing, realizing that his grounded plane would be easily destroyed by low-flying bomber machine-gun fire. That is why he continues the flight, twisting and turning at a low altitude in order to make the bombers give up due to lack of fuel, after which he would land undisturbed.
Setup
Board: 3 bi-fold segments (land), with 10 Terrain Markers, placed as shown in the diagram.
Task Markers: 6 area corners, as shown in the diagram.
German aircraft:
1x Fi 156 Storch, without any load, starting on the board at altitude L1.
American aircraft:
2x B-17 G Flying Fortress, without any load, starting on the board at altitude L5.
Specifics, Requirements and Restrictions
Aircraft presence in the combat zone:
Aircraft are permitted to actively attack other aircraft, even without using rule 4.7. Speed Difference When Firing (page __ in the Rulebook), as all aircraft in this Scenario are slow.
Tasks and Win Criteria
American Flying Fortresses have the task to destroy the German Storch, which only has a task to survive.
The German player wins if the Storch flies over the marked area at altitude LL, from Round 28 to 30 (which means it will land safely). If it gets shot down or fails to reach the marked area in time, the American player wins.
Any possible damage to the Storch does not affect the winner, as long as it is not destroyed.
The American player plays first. The game lasts until the German aircraft is either shot down or it lands successfuly (the latest until Round 30).
Two extremely different categories of aircraft, the heavy four-engine bombers and the ultra-light liaison aircraft, are fighting in the air. It is clear that the German aircraft with its single machine gun cannot damage the bombers. On the other hand, a low-mobility bomber can hardly get into a firing position, because it’s assumed that a light aircraft will skillfully use its agility and the ability to hide behind hills. However, two bombers attacking from two sides might be able to catch the German plane in the pincer maneuver and shoot it down.
Catch the Field Marshal
Three B-25 bombers return to their base after performing the bombing. None of them are damaged and they all have plenty of machine gun ammo. They are ordered by radio to immediately attack two German Ju 52 transport planes flying to the north-east, under the assumption that one of them has a Field Marshal of the Wehrmacht on board.
Since transport planes are very slow, direct fighter protection would be ineffective (and fighter pilots don't like it either), so two Ta 152 fighters were assigned to fly in the zone at a high-altitude. They have to be ready to intervene if there is an attack on transporter aircraft at any moment. The pilots of fighters spot the American bombers in time, but do not react immediately, believing that the Americans will not attack the transport planes. However, it turns out they were wrong.
Setup
Board: 3 bi-fold segments (land).
German aircraft:
2x Ju 52/3m g3e, starting on the board at altitude L5.
2x Ta 152, starting on Approach Panel at altitude L8.
American aircraft:
3x B-25 J Mitchell, without any load, starting on the board at altitude L6.
Before the start of the game, the German player writes down the transport aircraft designation number (36 or 37) in which the Field Marshal is located and hides this information from the opponent.
Specifics, Requirements and Restrictions
Aircraft presence in the combat zone:
If not using rule 4.7. Speed Difference When Firing (page __ in the Rulebook), the bombers are permitted to actively attack transport aircraft (and vice versa), but only defensively fire at fighters.
Tasks and Win Criteria
German transport aircraft have the task to leave the board towards north-east (through the eastern half of the northern board edge, marked black in the diagram), by the end of Round 18.
American bombers have the task to shoot down the Ju 52/3m carrying Field Marshal or prevent it from leaving the board in time. German fighters must protect the transport aircraft.
If both transport aircraft leave the board in time, the German player wins. If only one of the two succeeds, the hidden information is revealed and the German player wins if Field Marshal is in the aircraft that has escaped.
If none of the transport aircraft escape (either because they are destroyed or they fail to reach the board edge in time), the American player wins. If only one Ju 52/3m is shot down or prevented from escaping, the hidden information is revealed and the American player wins if it is the one carrying Field Marshal.
Destroying or damaging other aircraft does not affect the outcome of the game.
The American player plays first. The game lasts until both German transport aircraft are shot down, or until Round 18.
———————————————————————————————————
———————————————————————————————————
It's been more than three years since our Kickstarter project for the game Age of Dogfights: WWI ended.
During the Kickstarter campaign, the project was backed by almost 900 backers, and we collected over $120,000 on Kikstarter and in BackerKit pledge manager.
In the meantime, the game has gained great popularity and some excellent reviews and ratings, and holds an average rating of 8.3 on BoardGameGeek. Many gamers have publicly commented that they consider it to be the best air combat simulation game by various criteria, and the number and variety of aircraft types represented in the base game and expansions is undoubtedly the largest.
Back when the project was still being fulfilled, we announced that in the future, we would be offering two more expansions in collaboration with our trusted backer and WWI aircraft expert Bill Koff. These expansions are: Naval Aircraft and Exceptional Aircraft. Each of the two expansions will contain several dozen aircraft types and around a hundred individual aircraft tokens.
The third expansion will be Experimental Aircraft and Prototypes. It contains over 50 types of aircraft that were built only as a prototype or in a small series.
In addition, the campaign will offer two additional aircraft add-ons: The Storks and The Flying Circus. One of the two will be a reward for early pledges (48 hours), and the other for our returning backers from any of our previous campaigns. These add-ons contain 12 aircraft tokens each, of four different aircraft types.
Of course, in addition to new expansions and add-ons, the campaign will also offer a reprint of the base game AoD:WWI and all 5 original expansions. The base game will remain practically the same, except that some minor errors and inaccuracies in the Rulebook will be eliminated and corrected. The same applies to the original expansions, with the exception of the Ottoman Empire aircraft mini expansion that will now come in an optimized smaller box. The prices of the game and all expansions will be at a significant discount compared to the current prices on our website.
Our current priority is to finish the work on the rules for Age of Dogfights: WWII and begin the shipping phase, only then the new campaign will start.
Bill Koff has already done the aircraft selection and their values assigning, while the scenarios are in various stages of development. We believe that the third member of the team of authors will contribute to making the expansions better, which especially applies to scenarios that will be written in a different style than the previous ones. Our coworker Snežana, who is, among other things, in charge of drawing the contours of the aircraft, has already finished the major part of that work.
We hope that this future campaign will also be a successful one. We remind you that AoD:WWI is a simpler game than AoD:WWII, just as biplanes were simpler than their successors.